

The MultiLikes admin is shown in Japanese. On this page, screen labels appear in Japanese, followed by an English translation.
Before you start
- Make sure customers can favorite products (see Setting up product favorites)
- Put the products you want to discount into one collection
- If Shopify asks you to approve additional permissions when you open MultiLikes, approve them. They are used to create the campaign’s discount and to save banner images
Create a campaign
1
Open 「お気に入りタイムセール」 (Favorite time-limited sales)
In your Shopify admin, open MultiLikes from Apps, then open Flash sales in the app menu.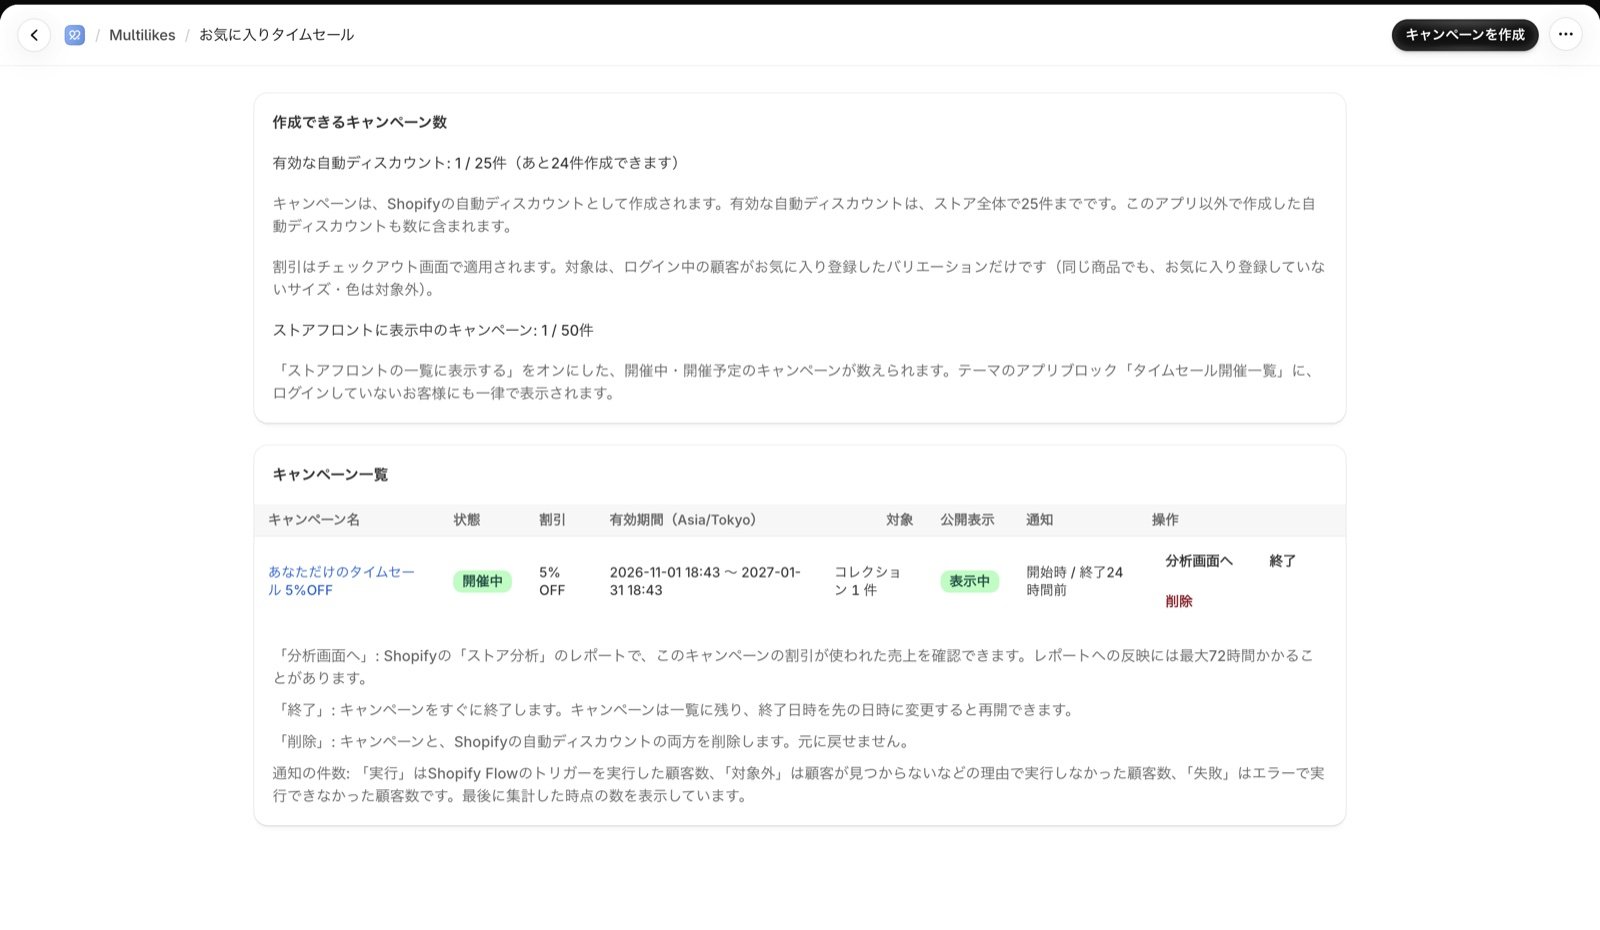
2
Click 「キャンペーンを作成」 (Create campaign)
Click 「キャンペーンを作成」 (Create campaign) at the top right.
3
Fill in the settings and create the campaign
Fill in the fields using “Settings” below, then click 「キャンペーンを作成」 (Create campaign) at the bottom of the screen.The campaign also appears under its campaign name in Discounts in your Shopify admin.
Settings
Basic settings, collection, and discount value
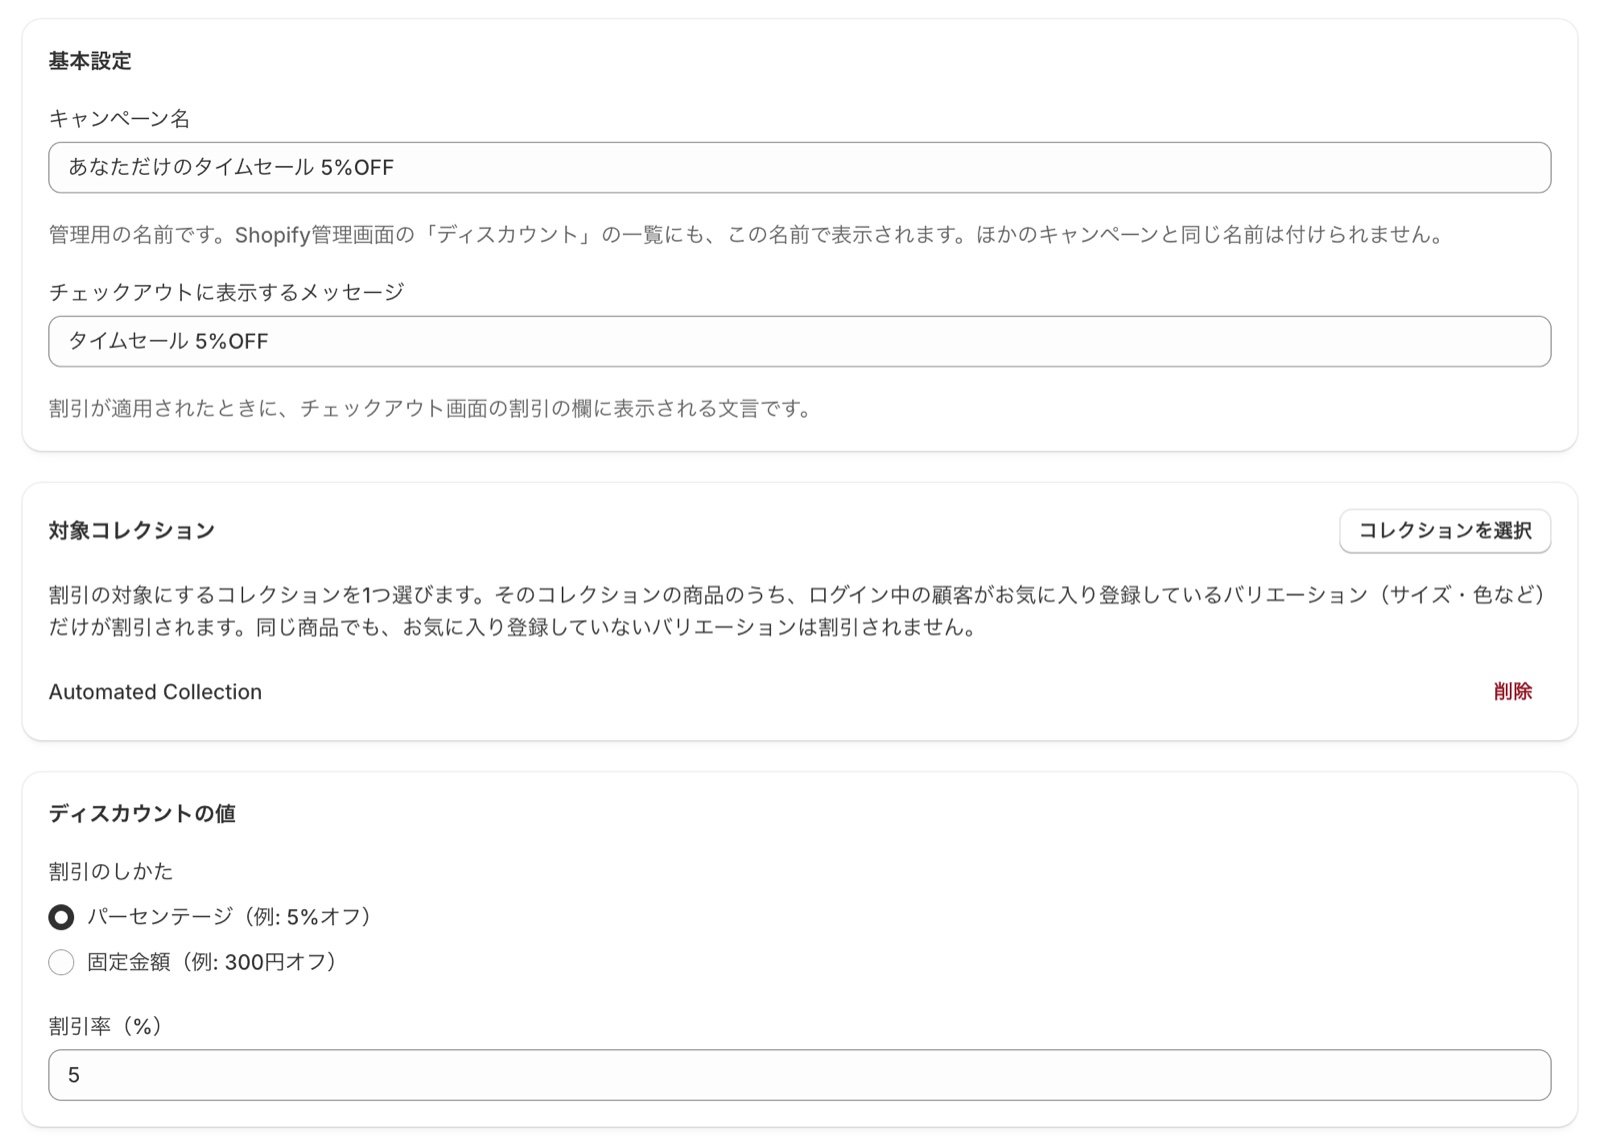
Of the products in the collection, only the variants (sizes, colors, and so on) that the logged-in customer has favorited are discounted. Narrowing the discount to the sizes and colors each customer chose makes it feel like a sale just for them.
Active dates
Enter dates and times in your store’s time zone. You can check the time zone in Settings > General in your Shopify admin. For a 24-hour sale, set the end to 24 hours after the start.
Combinations
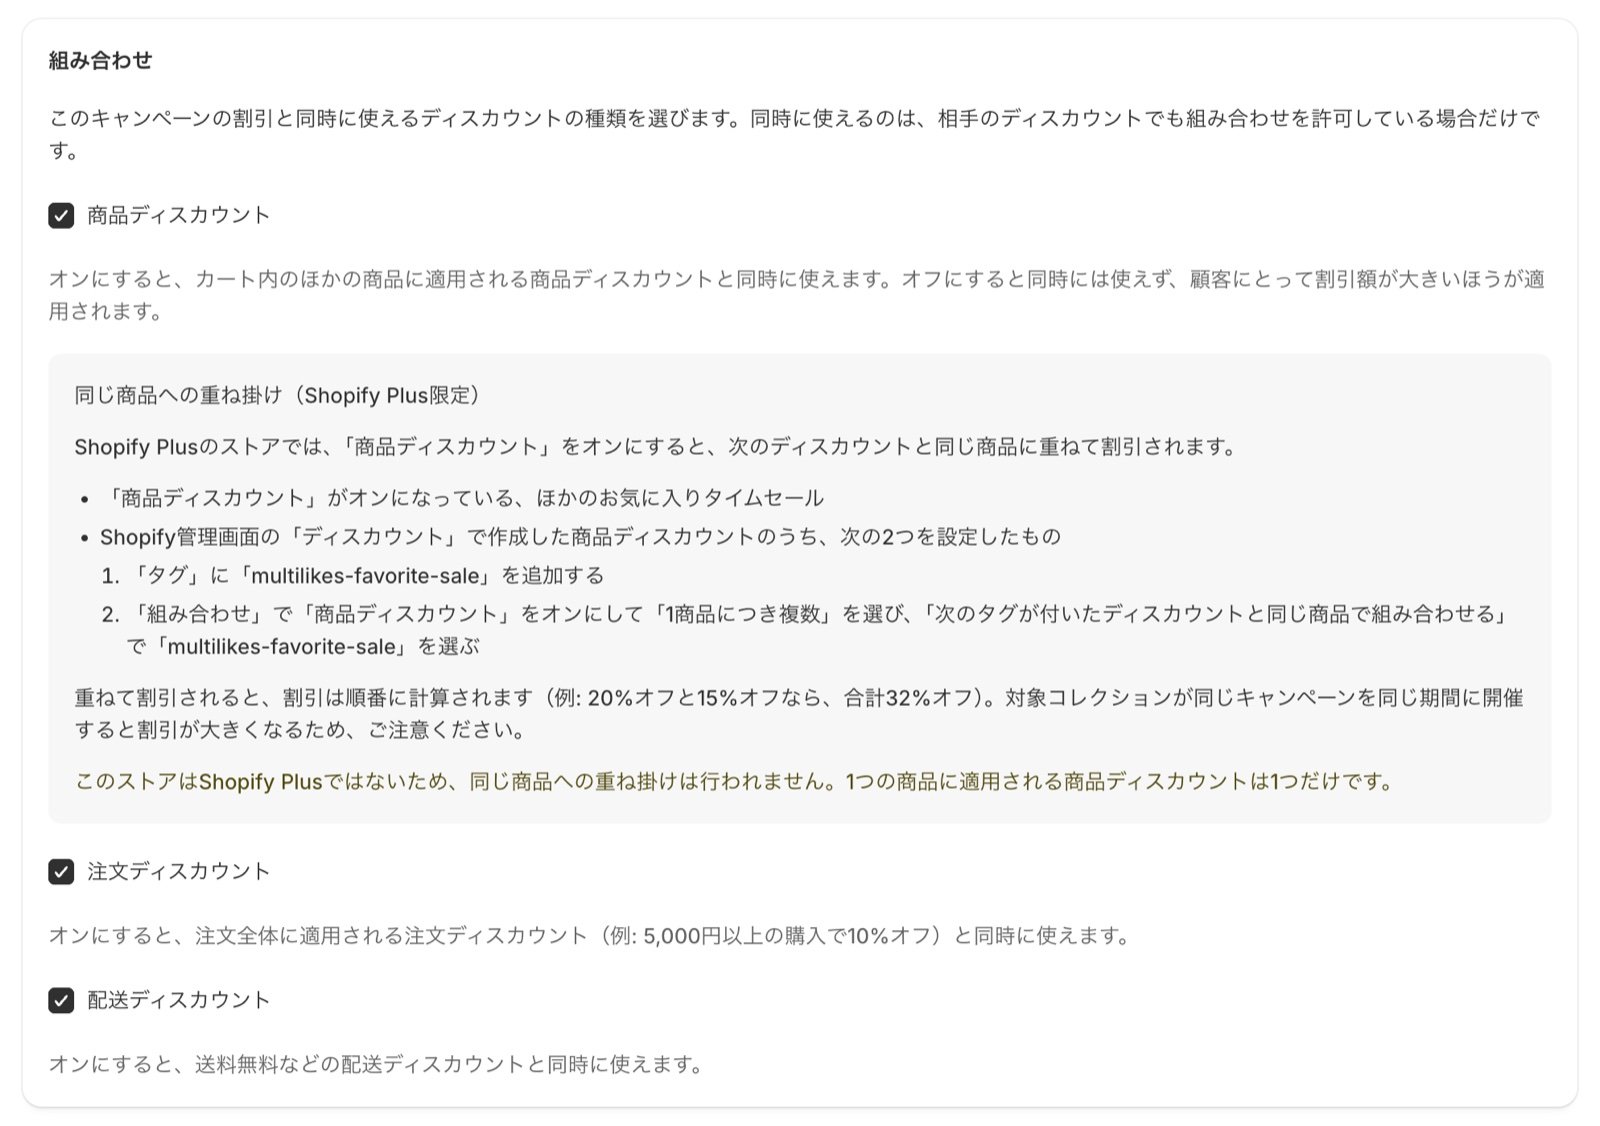
Stacking discounts on the same product (Shopify Plus)
On Shopify Plus stores, turning on 「商品ディスカウント」 (Product discounts) stacks the discount on the same product with the following discounts:- Other favorite time-limited sales with 「商品ディスカウント」 (Product discounts) turned on
- Product discounts created in Discounts in your Shopify admin with both of these settings:
- Add the tag
multilikes-favorite-saleunder Tags - Under Combinations, turn on Product discounts, choose the option to allow multiple discounts per product, and select
multilikes-favorite-saleas the tag of discounts to combine with on the same product
- Add the tag
Showing on your storefront
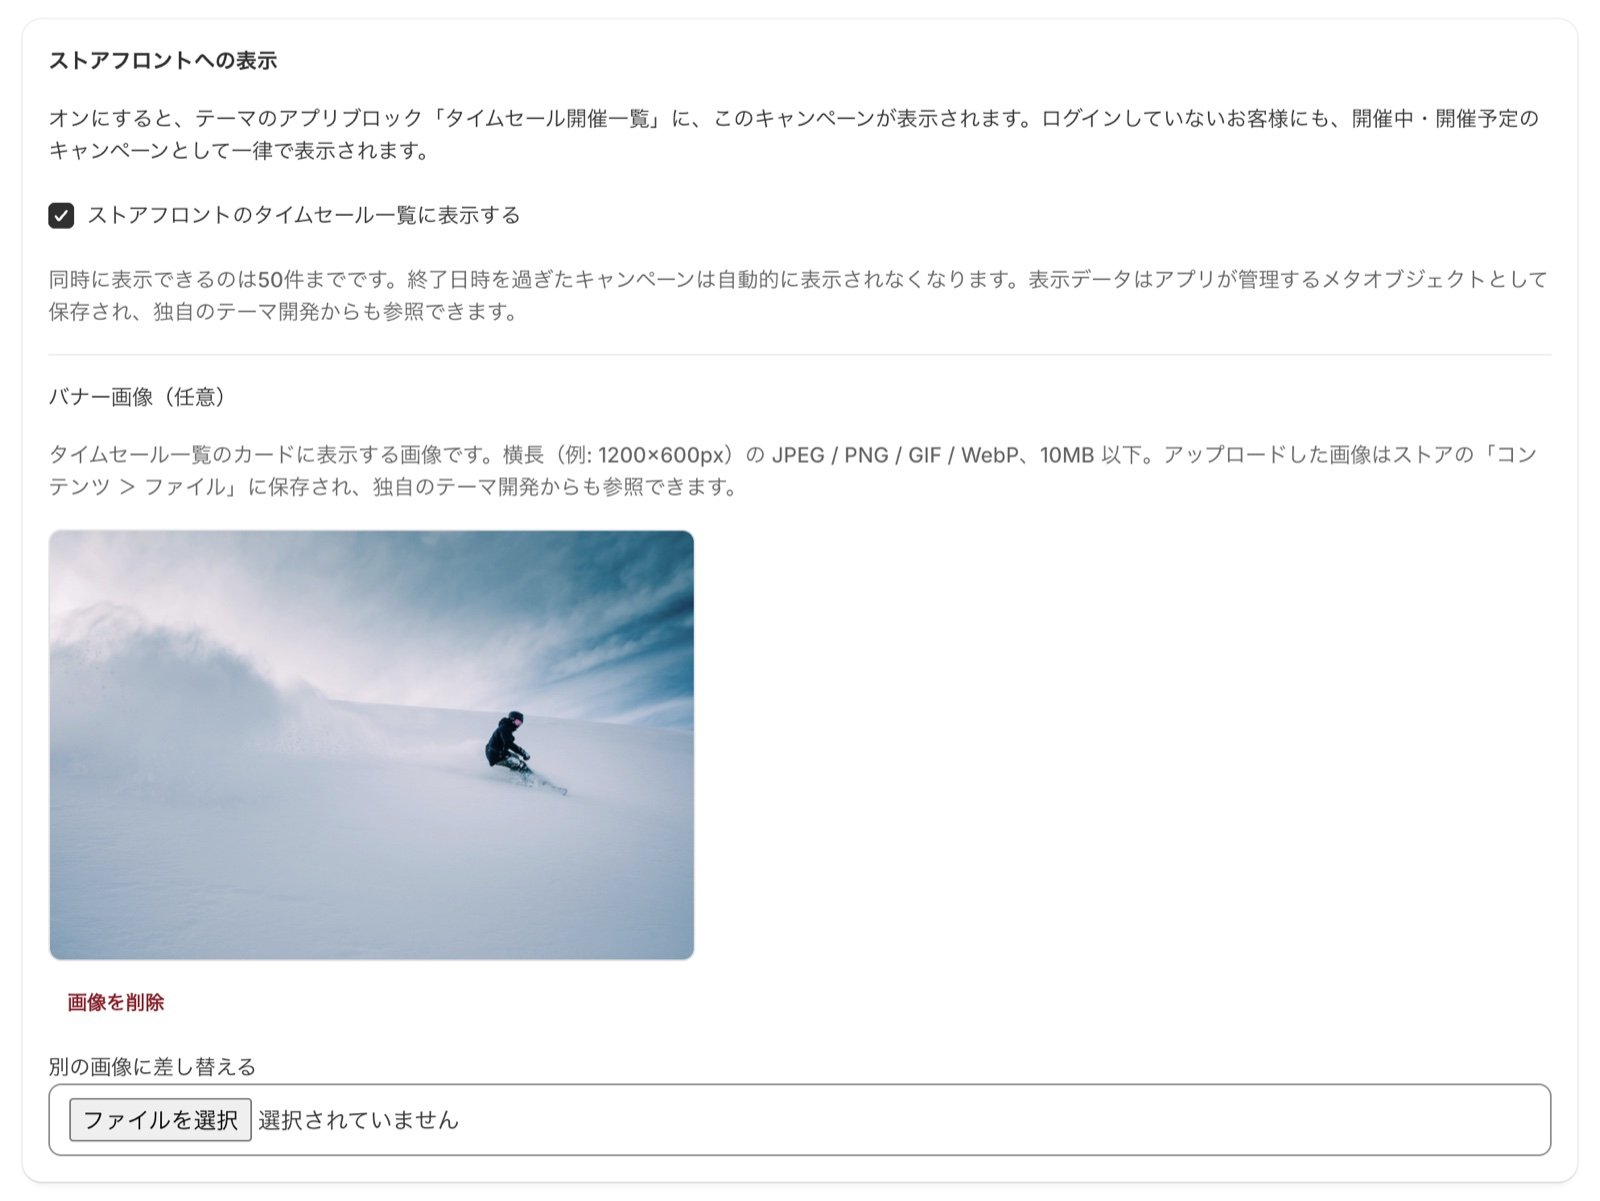
For how to add the block, see Showing favorite time-limited sales on your store.
Customer notifications
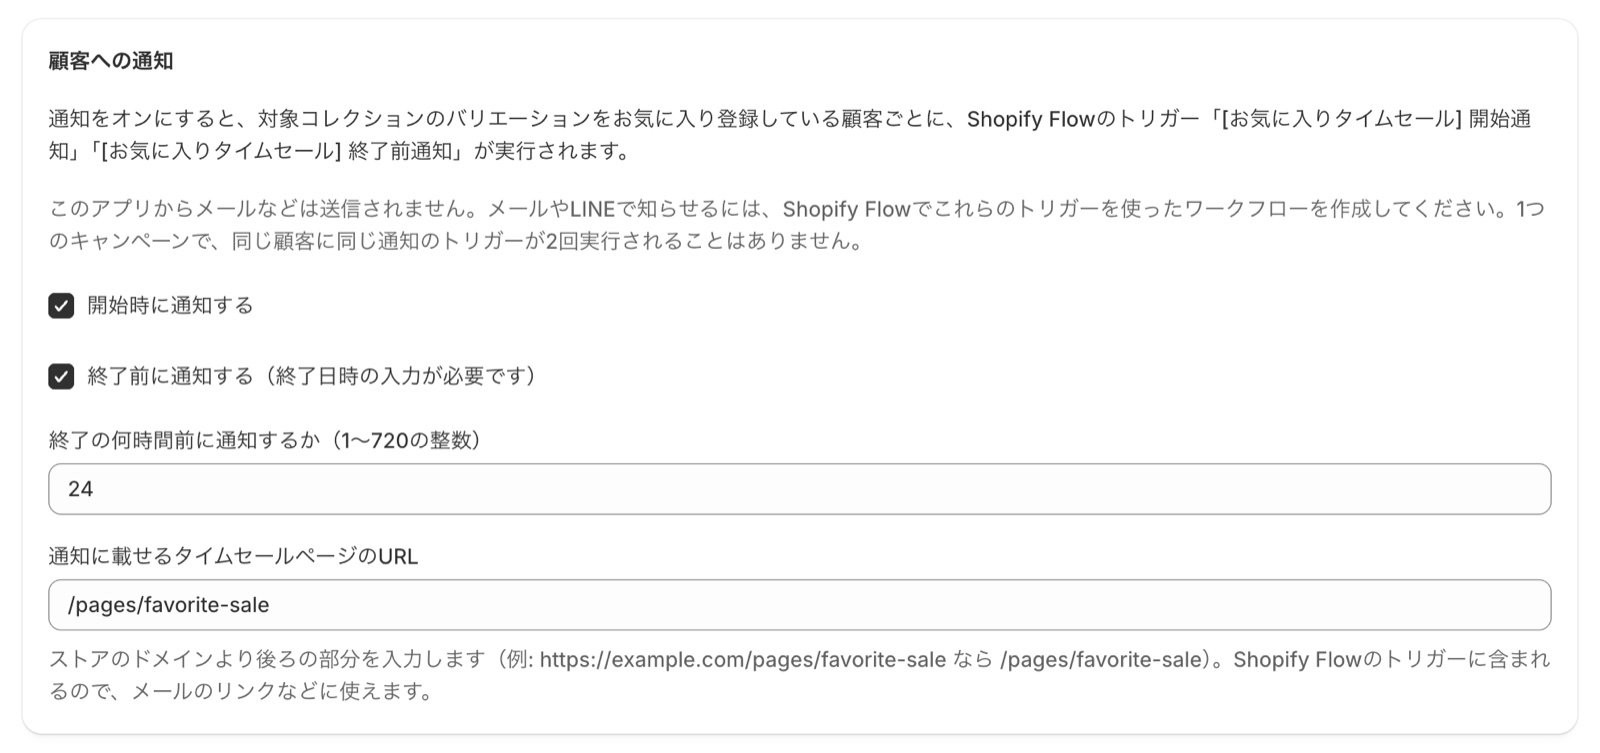
The triggers run once for each customer who has favorited a variant in the collection. You decide how to deliver the message, such as email or LINE, in your Shopify Flow workflow. See Notifying customers when a favorite time-limited sale starts and before it ends.
Reading the campaign list
Above the campaign list, you can see how many campaigns you can create (active automatic discounts and how many remain) and how many campaigns are shown on your storefront. The 「状態」 (Status) and 「公開表示」 (Storefront display) columns mean the following.
The 「通知」 (Notifications) column shows the notification settings and counts for each notification. 「実行」 (Run) is the number of customers the Shopify Flow trigger ran for, 「対象外」 (Skipped) is the number not run for reasons such as the customer not being found, and 「失敗」 (Failed) is the number that couldn’t run because of an error. The counts are as of the last tally.
Editing, ending, and deleting
Because campaigns are Shopify automatic discounts, you can also work with them from Discounts in your Shopify admin.
- Opening the campaign from the Discounts list opens the MultiLikes edit screen
- Deactivating or deleting the discount in Discounts is reflected in the MultiLikes campaign list