

Installing Checkout Address Validator JP alone doesn’t validate each recipient’s address. Checkout validates only the parent order’s single shipping address. To validate each recipient’s address (the shipping address of the child order), you need this integration.
When addresses are validated
Set it up
1
Install Checkout Address Validator JP and set up its rules
Install it from the Shopify App Store and set up the validation rules and error messages. The rules and messages you use at checkout are used for recipients’ addresses as well.
2
Issue an API key
In Checkout Address Validator JP, open 設定 (Settings) → API連携 (API integration) and press APIキーを発行 (Issue API key). Copy the API key (starts with 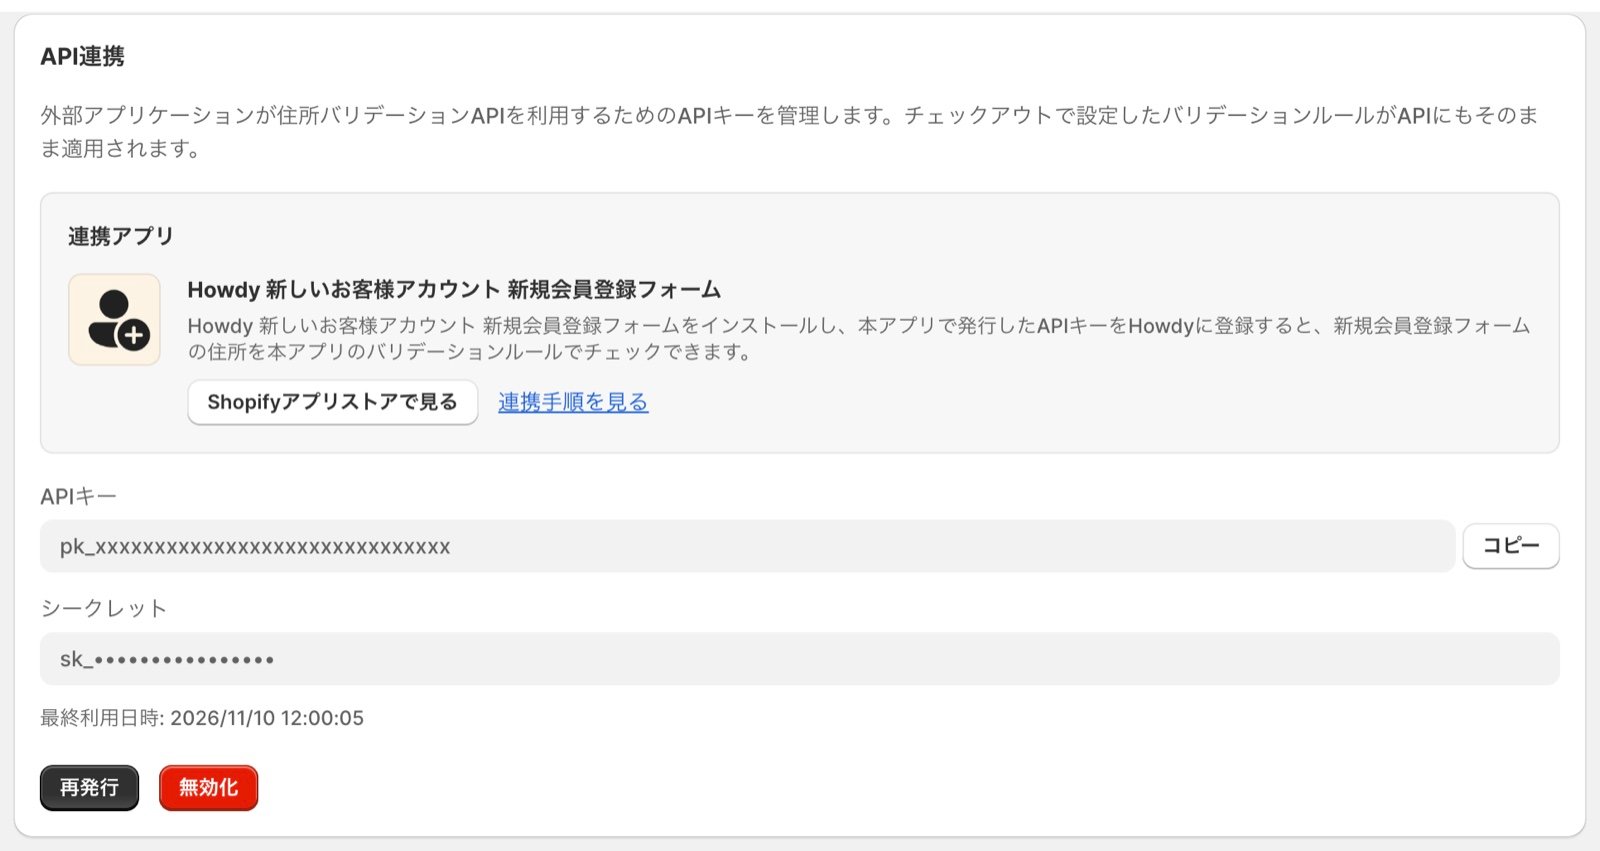
pk_) and the secret (starts with sk_). The secret is shown only when it’s issued.3
Register the API key and secret in MultiGifts
Open 連携アプリ (Integrations) in the MultiGifts menu, enter the API キー (API key) and シークレット (secret), and press 保存 (Save). MultiGifts validates a sample address once when saving, and 連携の状態 (Status) becomes 連携中 (Connected).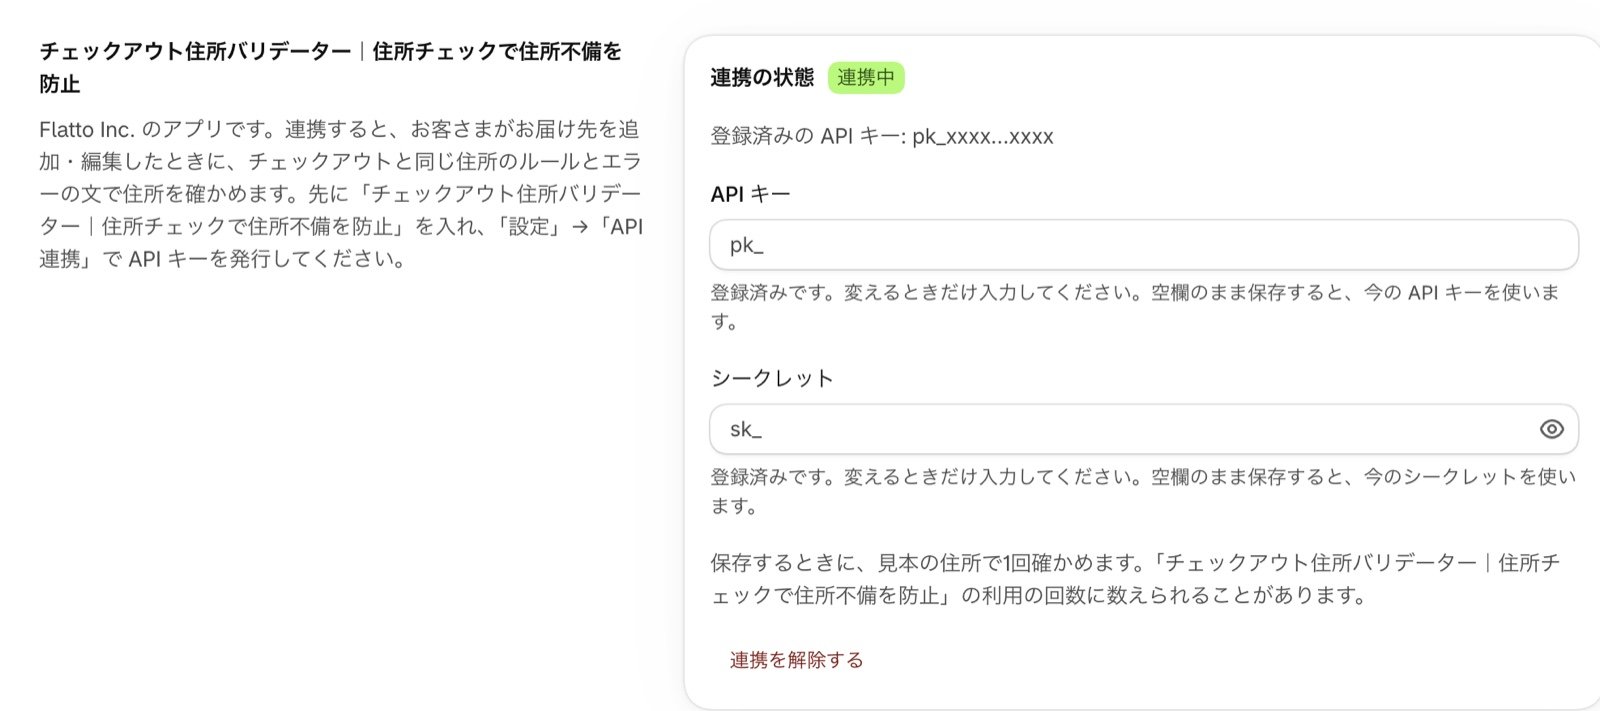
4
Check it on your storefront
In the cart, open 複数のお届け先に送る (Ship to multiple addresses) → 配送先を追加する (Add a destination), enter an address with a deliberate mistake (for example, a prefecture that doesn’t match the postal code), and press 登録する (Save). If the error message from Checkout Address Validator JP appears below the field and the form stays open, the setup is complete. It can take a little while after saving for the change to reach the storefront.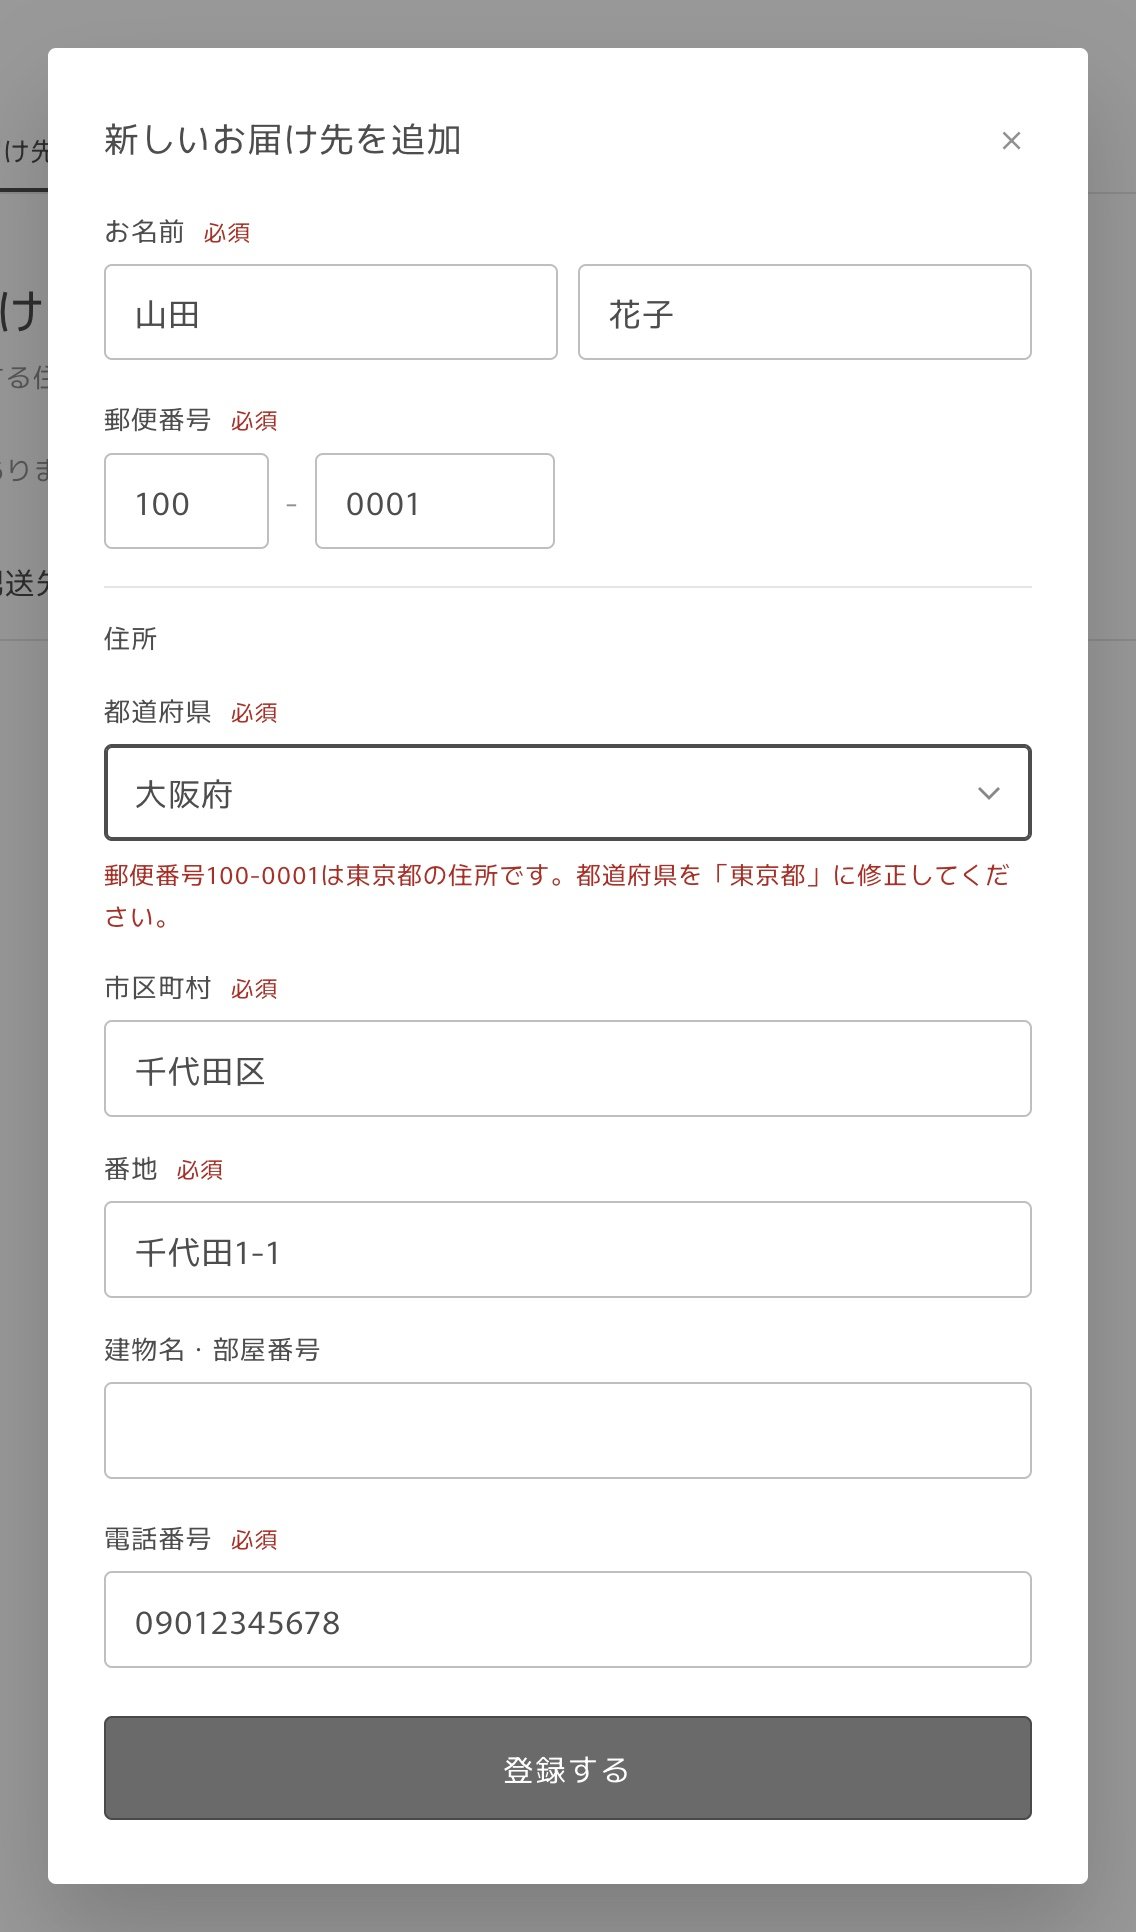
What customers see
- After pressing 登録する (Save), “住所を確認しています…” (Checking the address…) appears and the button is disabled until the check finishes (this can take a few seconds)
- If there’s a mistake, the error message appears below the field and the form stays open. When the customer fixes it and presses 登録する (Save) again, the address is registered
- A message that doesn’t belong to a specific field appears above the 登録する (Save) button
- The messages are the ones set in Checkout Address Validator JP. They stay in Japanese on English storefronts
When the address can’t be validated, it’s registered as it is
When Checkout Address Validator JP can’t be reached or the API key no longer works, MultiGifts doesn’t stop the customer: the address is registered without validation. The issue is shown with its date and time on the 連携アプリ (Integrations) page of MultiGifts.Data sent and usage
For each check, MultiGifts sends the last name, first name, postal code, prefecture, city, street address, and building the customer entered to Checkout Address Validator JP. The phone number isn’t sent. MultiGifts doesn’t store the result, and the address is saved to the customer’s Shopify account (see Where are recipients’ addresses saved?). A check runs each time a customer presses 登録する (Save), and once with a sample address when you save on the Integrations page. These checks may count toward the usage of Checkout Address Validator JP.Change the API key or disconnect
- If you reissue the API key in Checkout Address Validator JP, the previous key stops working. Register the new API key and secret on the 連携アプリ (Integrations) page. Until then, addresses are registered without validation
- If you leave a field empty when saving on the Integrations page, the registered value for that field is kept
- Press 連携を解除する (Disconnect) to delete the registered API key and secret and stop validating. To connect again, enter the API key and secret again
- Uninstalling MultiGifts also deletes the registered API key and secret