> ## Documentation Index
> Fetch the complete documentation index at: https://docs.bouquet-inc.com/llms.txt
> Use this file to discover all available pages before exploring further.
# お気に入り一覧ページの設定方法
> マイページ上に表示するお気に入り機能の設定方法になります。
## 操作方法
### ① オンラインストア > テーマを編集する、よりページ > テンプレートを作成を選択します
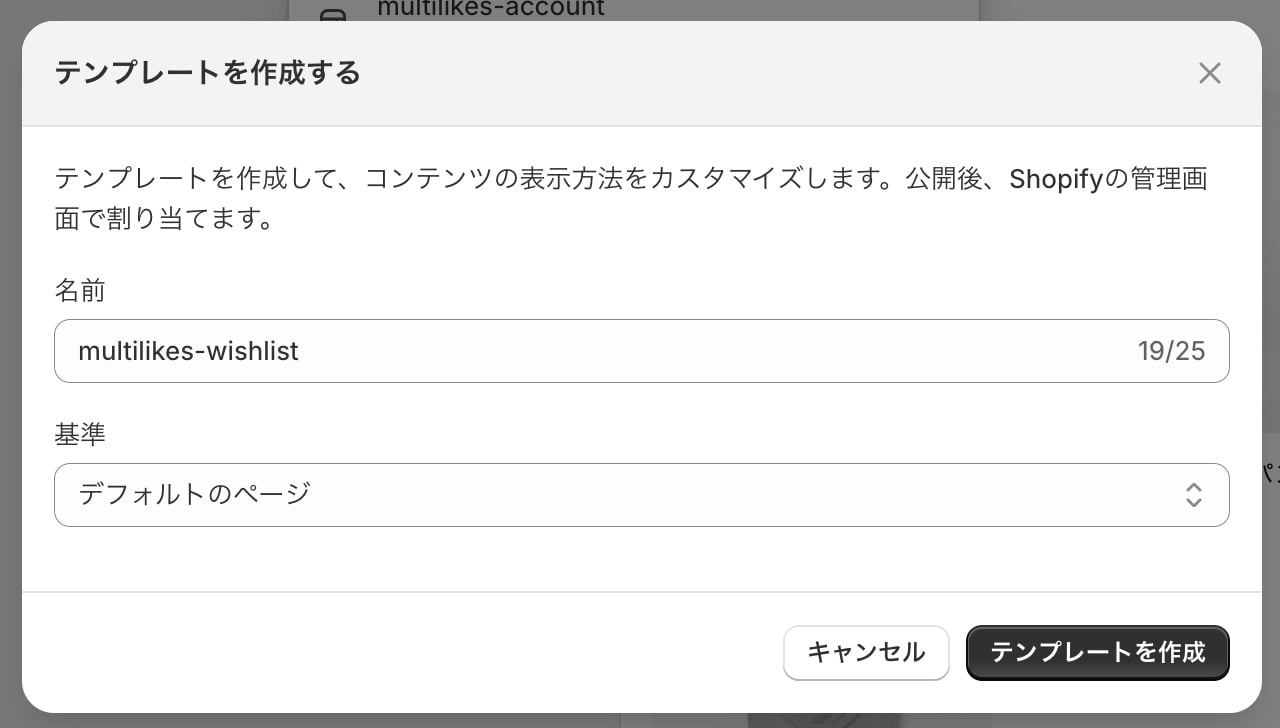
 ### ② テンプレート名を入れ、「テンプレートを作成」、のボタンを押します。
テンプレート名: `multilikes-wishlist`
### ② テンプレート名を入れ、「テンプレートを作成」、のボタンを押します。
テンプレート名: `multilikes-wishlist`
 ### ③ 「+ブロックを追加」から「お気に入り登録一覧ボタン」を追加します
 ### ④ 保存を押し、サイト表示を確認します
### ⑤ 正しく表示されていることを確認し、設定完了です。
## Shopifyの顧客アカウントが「新しいお客様」に設定されているマーチャントさま向け
2026年1月現在、Shopifyは顧客アカウントに2つの仕様を提供しております。
* 従来のバージョン
* 顧客アカウント
という名称で(左下)設定 > お客様アカウントから確認ができます。
顧客アカウント(新仕様)に関しても設定方法は共通になりますのでよろしくお願いします。(マイページのメニューに上記で作成したリンクを設定してください)
## Related topics
- [商品お気に入りの設定方法](/apps/multilikes/setup/product-favorites.md)
- [ページお気に入り設定方法](/apps/multilikes/setup/page-favorites.md)
- [ブランド・店舗お気に入りの設定方法](/apps/multilikes/setup/brand-store-favorites.md)
### ④ 保存を押し、サイト表示を確認します
### ⑤ 正しく表示されていることを確認し、設定完了です。
## Shopifyの顧客アカウントが「新しいお客様」に設定されているマーチャントさま向け
2026年1月現在、Shopifyは顧客アカウントに2つの仕様を提供しております。
* 従来のバージョン
* 顧客アカウント
という名称で(左下)設定 > お客様アカウントから確認ができます。
顧客アカウント(新仕様)に関しても設定方法は共通になりますのでよろしくお願いします。(マイページのメニューに上記で作成したリンクを設定してください)
## Related topics
- [商品お気に入りの設定方法](/apps/multilikes/setup/product-favorites.md)
- [ページお気に入り設定方法](/apps/multilikes/setup/page-favorites.md)
- [ブランド・店舗お気に入りの設定方法](/apps/multilikes/setup/brand-store-favorites.md)